Google Cloud
Step 1: Create an IAM Service Account
Access the Google Cloud Console
Open the Google Cloud Console.
Click the menu (☰) in the top-left corner.
Navigate to IAM & Admin > Service Accounts.
Create the Service Account
Click the Create Service Account button.
Provide a Name (e.g.,
sitespanel-gce,sitespanel-gcs, orsitespanel-dns-integration) and an optional Description.Click Create and Continue.
Step 2: Grant Access to the Service Account
A. IAM Level Permissions
Open IAM Settings
From the dashboard, navigate to IAM & Admin > IAM.
Grant Access
Click the Grant Access button.
Add Principals
In the Add Principals section, enter the email of the service account you created (e.g.,
sitespanel-gce|gcs|dns-integration).Select the email when it appears in the search results.
Assign Permissions
For Automatic Deployment:
Click Select a Role.
Under Compute Engine, choose Compute Admin.
Click Save.
For Automatic SSL/TLS (Certbot DNS Plugin):
Project Level Permissions:
Click Select a Role.
Under DNS, choose DNS Administrator.
Click Save.
Resource Level Permissions:
Navigate to Network Services > Cloud DNS.
Select the required DNS zone.
Click Permissions, then Add Principal.
Enter the service account email.
Assign the DNS Administrator role.
Click Save.
For Automatic Snapshots Sync:
Go to Storage > Buckets.
Select the target bucket and click on its name.
Open the Permissions tab.
Click Grant Access.
Add the service account email.
Under Assign Roles, expand Cloud Storage and choose Storage Object Admin.
Click Save.
Step 3: Download the Service Account Key
Locate the Service Account
Go to IAM & Admin > Service Accounts.
Find your service account (e.g., "Deployment Helper").
Generate the Key
Click the three-dot menu (⋮) next to the service account.
Select Manage Keys.
Click Add Key, then choose JSON.
Secure the Key
A JSON file will be downloaded. This is your service account key.
Important: Keep this file secure. It grants access to your project and must not be shared.
This guide ensures seamless integration with Google Cloud services for deployment, SSL/TLS, and snapshots.
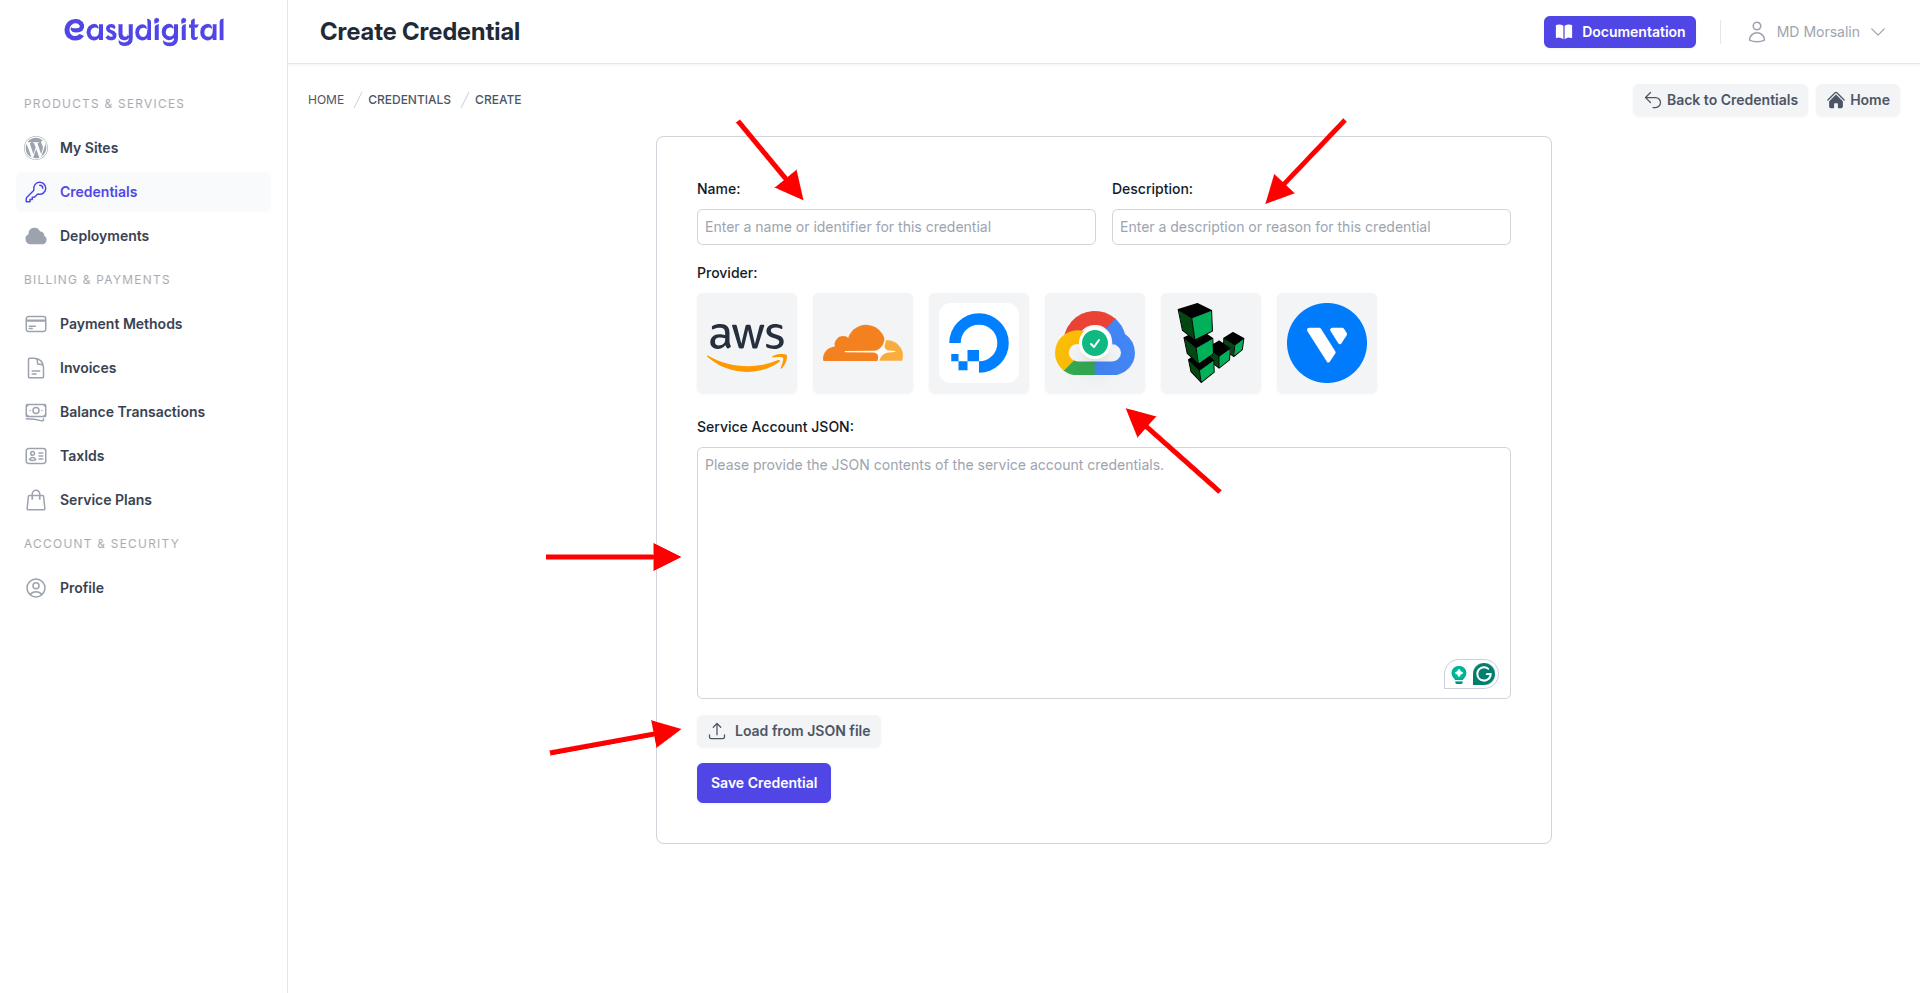
Step 4: Setup Credential
Open the Credential Create Page.
Fill out the following fields:
 |
|---|
Field | Description | Type |
|---|---|---|
Name | Provide a unique name for the credential (e.g., "google-cloud-credential-123"). | String |
Description | Add a brief description for the credential (e.g., "Used for automatic deployment"). | String |
Provider | Select Google Cloud by clicking on the Google Cloud logo. | Enum (Click on the Google Cloud logo) |
Service Account JSON | Paste the contents of the Service Account JSON file you downloaded earlier. Alternatively, use the Load from JSON file button. | String (Paste or Load the JSON file) |