AWS
Step 1: Create AWS IAM Policy For Use Case
Go to the AWS Console and log in with your account credentials.
Automatic Deployment (Lightsail)
Open the IAM Policies Page.
Select Filter by Type to Customer Managed.
Check if a policy named LightsailAdmin already exists.
If it exists, proceed to the next section for IAM User creation.
If not, click Create Policy.
Select Lightsail from the Service dropdown (you can search to find it faster).
In the Actions Allowed section, check the box for All Lightsail actions (lightsail:*).
Set the Effect to Allow.
In the Resources section, select All.
Click Next and enter a Policy Name (e.g.,
LightsailAdmin).Add a description and click Create Policy.
Automatic Snapshots Sync (S3)
Open the IAM Policies Page.
Select Filter by Type to Customer Managed.
Check if a policy named S3FullAccess already exists.
If it exists, proceed to the next section for IAM User creation.
If not, click Create Policy.
Select S3 from the Service dropdown (you can search to find it faster).
In the Actions Allowed section, check the box for All S3 actions (s3:*).
Set the Effect to Allow.
In the Resources section, select All.
Click Next and enter a Policy Name (e.g.,
S3Admin).Add a description and click Create Policy.
Automatic SSL/TLS (Certbot DNS Plugin—Route53)
Open the IAM Policies Page.
Select Filter by Type to Customer Managed.
Check if a policy named Route53Admin already exists.
If it exists, proceed to the next section for IAM User creation.
If not, click Create Policy.
Select Route53 from the Service dropdown (you can search to find it faster).
In the Actions Allowed section, check the box for All Route53 actions (route53:*).
Set the Effect to Allow.
In the Resources section, select All.
Click Next and enter a Policy Name (e.g.,
Route53Admin).Add a description and click Create Policy.
Step 2: Create AWS IAM User with Policy
Open the IAM Users Page.
Click the Create user button.
Enter a Username (e.g.,
sitespanel.io).Click Next.
In the Set Permissions section:
Choose Attach policies directly.
Select Customer Managed in Filter by Type.
Search for and select the policy you created earlier (e.g.,
LightsailAdmin,S3Admin, orRoute53Admin).
In the Review and Create section, verify that everything is correct.
Click Create user.
Step 3: Create Access Key and Secret Access key
Open the IAM Users Page.
Navigate to the User Details page for the user you created.
Go to the Security Credentials tab.
Scroll down to the Access Keys section.
Click the Create Access Key button.
In the Access key best practices and alternative section:
Select Third-party service.
Check the Confirmation checkbox to acknowledge the terms.
Click Next.
Optionally, add a description for the access key.
Click Create Access Key.
Copy the Access Key ID and Secret Access Key and save them in a secure location. The Secret Access Key cannot be retrieved again after this step.
Setup Credential
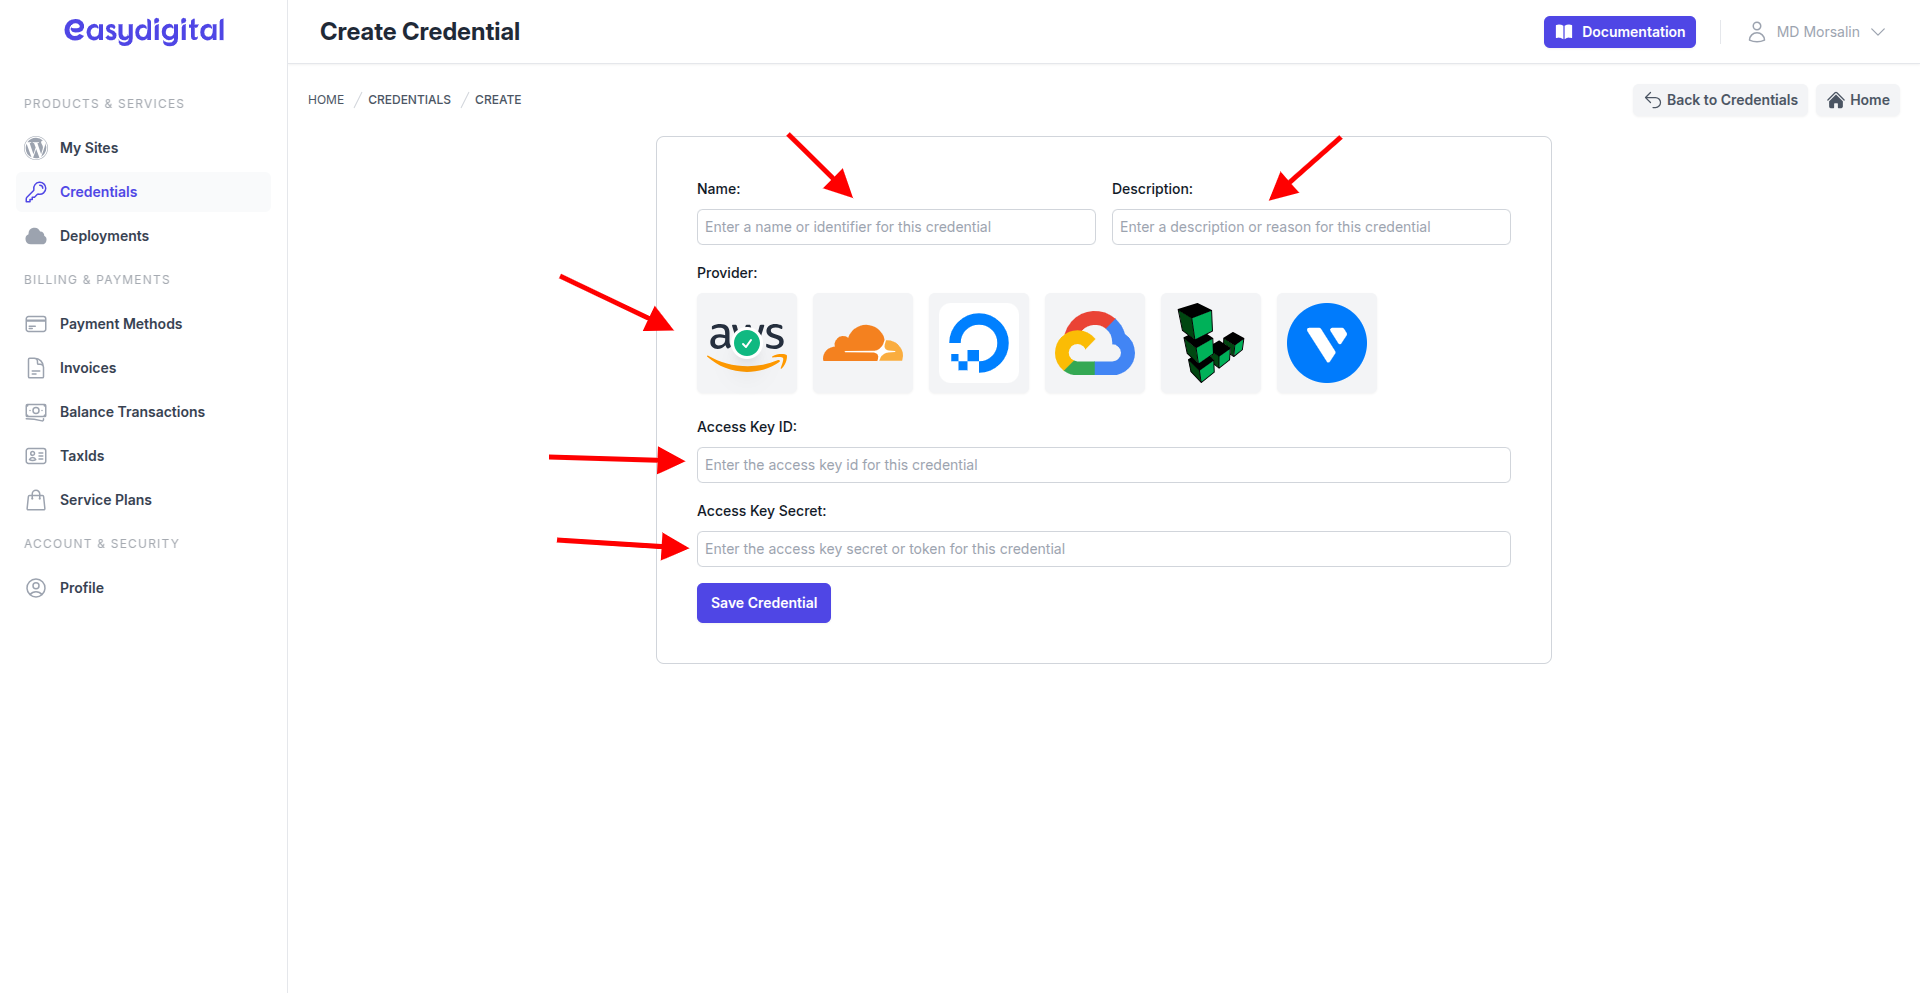
Open the Credential Create Page.
Fill out the following fields:
 |
|---|
Field | Description | Type |
|---|---|---|
Name | Name for the credential (e.g., "aws-cloud-credential-123"). | String |
Description | Description for the credential (e.g., "Used for automatic deployment"). | String |
Provider | Select AWS by clicking on the AWS logo. | Enum (Click on the AWS logo) |
Access Key ID | Paste the AWS Access key you copied earlier. | String (Paste the AWS Access key here) |
Access Key Secret | Paste the AWS Secret Access Key you copied earlier. | String (Paste the AWS Secret Access Key here) |